跳转至

博客汇

云服务器使用docker部署RuseDest服务

1.参照官网步骤

  • https://rustdesk.com/zh-cn/
  • https://blog.csdn.net/networken/article/details/140536087

步骤 1:安装 Docker

Text Only
1
bash <(wget -qO- https://get.docker.com)

步骤 2:下载 compose.yml

Text Only
1
wget rustdesk.com/oss.yml -O compose.yml

Text Only
1
wget rustdesk.com/pro.yml -O compose.yml

步骤 3:启动 Compose

Text Only
1
docker compose up -d

运行成功会在当前路径下生成 data文件夹其中密钥文件为xx.pub

Text Only
1
cat ./data/id_ed25519.pub

准备就绪!

2.登录阿里云控制台,配置防火墙规则,开通以下端口

放通TCP端口 21115、21116、21117 放通UDP端口 21116

3.连接验证

服务端搭建好后,在要连接的两个客户端设备上都下载 RustDesk 客户端。

下载地址是:https://github.com/rustdesk/rustdesk/releases

首先找到 RustDesk 客户端的 设置 -> ID/中继服务器 ,然后输入如下三个信息

ID 服务器:rustdesk.example.com:21116,默认端口为21116时可以省略端口配置

Key:填写部署服务默认生成的 id_ed25519.pub 文件中的内容

示例配置

按照图片高度拆分为多个图 DeepSeek(元宝) 按需求写代码,零修改

  • 需求:写个python 脚本,读取图片,按照图片高度拆分为多个图,比如 输入5 时,按高度截取为5个子图
Python
 1
 2
 3
 4
 5
 6
 7
 8
 9
10
11
12
13
14
15
16
17
18
19
20
21
22
23
24
25
26
27
28
29
30
31
32
33
34
35
36
37
38
39
40
41
42
43
44
45
46
47
48
49
50
51
52
53
54
55
56
57
58
import argparse
import os
from PIL import Image

def validate_arguments(input_path, num_split):
    if not os.path.isfile(input_path):
        raise FileNotFoundError(f"输入文件 {input_path} 不存在")
    if num_split <= 0:
        raise ValueError("拆分数量必须大于0")

def split_image(input_path, output_dir, num_split):
    # 验证参数有效性
    validate_arguments(input_path, num_split)

    # 打开原始图片
    img = Image.open(input_path)
    width, height = img.size

    # 检查拆分数量是否超过图片高度
    if num_split > height:
        raise ValueError(f"拆分数量({num_split})超过图片高度({height})")

    # 计算每个子图的高度分配
    split_height = height // num_split
    remainder = height % num_split

    # 生成高度列表(前remainder个子图高度+1)
    heights = [split_height + 1 if i < remainder else split_height 
               for i in range(num_split)]

    # 准备输出目录和文件名
    os.makedirs(output_dir, exist_ok=True)
    filename = os.path.basename(input_path)
    name, ext = os.path.splitext(filename)

    # 拆分并保存图片
    current_height = 0
    for i, h in enumerate(heights):
        # 计算裁剪区域
        box = (0, current_height, width, current_height + h)
        cropped_img = img.crop(box)

        # 生成输出路径
        output_path = os.path.join(output_dir, f"{name}_{i}{ext}")
        cropped_img.save(output_path)

        current_height += h

if __name__ == "__main__":
    # 配置命令行参数解析
    parser = argparse.ArgumentParser(description="将图片按高度拆分为多个子图")
    parser.add_argument("-i", "--input",  required=True, help="输入图片路径")
    parser.add_argument("-o", "--output", required=True, help="输出目录")
    parser.add_argument("-n", "--num_split", type=int, required=True, help="拆分数量")

    # 解析参数并执行拆分
    args = parser.parse_args()
    split_image(args.input, args.output, args.num_split)

运行

Text Only
1
python aa.py -i 1.jpg -o o -n 5

Windows资源管理器侧边栏有两个onedrive快速访问,如何删除其中一个?

  • 转载自 https://blog.csdn.net/qq_40483419/article/details/145280493

1. 场景还原

新安装的windows系统安装onedrive后,在资源管理器侧边栏存在两个快速访问入口,强迫症的我想删掉一个只保留一个,直接右键是无法删除的。

  • 1

2. 导致因素

Windows 10 和 Windows 11 通常预装了 OneDrive,并自动为当前用户配置了一个入口。如果用户重新下载安装了一个独立版本的 OneDrive,可能会导致资源管理器同时显示两个入口。

3. 解决方案

1. 手动方案

打开注册表,找到OneDrive - Personal 条目的文件夹

定位到

HKEY_CURRENT_USER\SOFTWARE\Microsoft\Windows\CurrentVersion\Explorer\Desktop\NameSpace,找到OneDrive - Personal 条目的文件夹并复制文件夹ID

  • 2

在CLSID 文件夹修改System.IsPinnedtoNameSpaceTree

注册表中再次定位到HKEY_CLASSES_ROOT\CLSID\,找到刚刚搜索到的文件夹名,把System.IsPinnedtoNameSpaceTree的值改为0,再次打开资源管理器可以看到效果。 - 3

2. 脚本方案

手动方案太麻烦,下面提供一个脚本,打开powershell运行即可。

PowerShell
 1
 2
 3
 4
 5
 6
 7
 8
 9
10
11
12
13
14
15
16
17
18
19
20
21
22
23
24
25
26
27
28
29
30
31
32
33
34
35
36
37
38
39
40
41
# 定义路径
$namespacePath = "HKCU:\Software\Microsoft\Windows\CurrentVersion\Explorer\Desktop\NameSpace"
$clsidRootPath = "HKEY_CLASSES_ROOT\CLSID"
$searchValue = "OneDrive - Personal"

# 查找 "OneDrive - Personal" 对应的 DirectoryName
$directoryName = Get-ChildItem -Path $namespacePath | ForEach-Object {
    $keyPath = $_.PSPath
    try {
        # 获取默认值
        $defaultValue = (Get-ItemProperty -Path $keyPath -ErrorAction Stop)."(default)"
        if ($defaultValue -eq $searchValue) {
            $_.PSChildName  # 返回子键名(GUID 格式)
        }
    } catch {
        Write-Warning "无法访问注册表键:$keyPath"
    }
} | Select-Object -First 1  # 只取第一个匹配的结果

# 检查是否找到 DirectoryName
if ([string]::IsNullOrWhiteSpace($directoryName)) {
    Write-Warning "未找到 'OneDrive - Personal' 对应的 DirectoryName,请检查注册表内容是否正确。"
} else {
    # 构造完整的 CLSID 注册表路径
    $targetPath = "$clsidRootPath\$directoryName"

    # 使用 .NET 访问注册表键
    try {
        $registryKey = [Microsoft.Win32.Registry]::ClassesRoot.OpenSubKey("CLSID\$directoryName", $true)
        if ($registryKey) {
            # 修改 System.IsPinnedToNameSpaceTree 的值为 0
            $registryKey.SetValue("System.IsPinnedToNameSpaceTree", 0, [Microsoft.Win32.RegistryValueKind]::DWord)
            $registryKey.Close()
            Write-Host "已成功将 $targetPath 的 'System.IsPinnedToNameSpaceTree' 修改为 0。" -ForegroundColor Green
        } else {
            Write-Warning "路径 $targetPath 不存在,无法修改。"
        }
    } catch {
        Write-Warning "无法访问或修改注册表键:$targetPath。错误信息:$_"
    }
}

计算panel bed编码区长度

Bash
 1
 2
 3
 4
 5
 6
 7
 8
 9
10
11
12
13
14
15
16
17
18
19
20
21
22
23
24
25
26
27
28
29
30
#!/bin/bash
#@File    :   run.sh
#@Time    :   2023/11/21 09:32:17
#@Author  :   biolxy
#@Version :   1.0
#@Contact :   biolxy@aliyun.com
#@Desc    :   None

inputbed=$1

# export PATH=/data/biogonco/lixy/bedtools/bedtools2/bin:$PATH  # v2.30.1 不行
export PATH=/data/bioinfo_project/bioinfo_miniconda3/bin:$PATH  # v2.30.0 不行
# /data/biogonco/lixy/bedtools/bedtools2/bin/bedtools

bedtools merge -i ${inputbed} > merge.bed

bedtools summary -i merge.bed -g /mnt/nas_001/project/oncodemo/genome_and_annotation/hg19/gatk/b37/chrom.sizes > merge.bed.summary  # 统计的是 bed 区间的长度


# 去 gencode 下载 gencode.v41.annotation.gff3
# wget https://ftp.ebi.ac.uk/pub/databases/gencode/Gencode_human/release_44/GRCh37_mapping/gencode.v44lift37.annotation.gff3.gz
# /mnt/nas_001/project/oncodemo/genome_and_annotation/genome/gffread-0.12.7.Linux_x86_64/gffread gencode.v44lift37.annotation.gff3 -T -o gencode.v44lift37.annotation.bed
# awk '$3 == "CDS"' gencode.v44lift37.annotation.bed | sed 's/^chr//g' > coding_CDS.bed

# coding_CDS.bed 为编码区bed

bedtools intersect -a merge.bed -b /mnt/nas_001/project/oncodemo/genome_and_annotation/genome/coding_CDS.bed | sort -k1,1 -k2,2n |  bedtools merge -i - > panel.cds.bed

# panel.cds.bed 为 pane 的 编码区 bed
bedtools summary -i panel.cds.bed -g /mnt/nas_001/project/oncodemo/genome_and_annotation/hg19/gatk/b37/chrom.sizes > panel.cds.summary 

注意

要注意bedtools的版本问题,我测试的 v2.30.0可以,v2.30.1 不行

准确度和灵敏度和特异性

定义

Precision 准确度:指找出来的突变中的真阳性有多少

Recall 召回率:指总突变集合有多少可以被找出来

公式

准确度(Precision)

准确度是指在所有被预测为阳性(即突变)的样本中,实际为阳性(真阳性)的比例。换句话说,它衡量的是预测结果中真阳性的比例。其计算公式为:

\(\text{Precision} = \frac{TP}{TP + FP}\)

其中,TP是真阳性的数量,FP是假阳性的数量。

召回率(Recall)或 灵敏度/敏感度(Sensitivity)

召回率是指在所有实际为阳性的样本中,被正确预测为阳性(即真阳性)的比例。它衡量的是测试方法捕捉到所有实际阳性样本的能力。其计算公式为:

\(\text{Recall} = \frac{TP}{TP + FN}\)

其中,TP是真阳性的数量,FN是假阴性的数量。

这两个指标通常用于评估分类模型的性能,特别是在医学和生物学研究中,它们帮助研究者理解一个测试或分析方法在识别阳性样本方面的准确性和完整性。在体细胞变异检测的背景下,这两个指标对于评估变异检测算法的性能至关重要。

特异性(Specificity)

特异性是指在实际没有某种疾病的人群中,诊断测试能够正确排除非患者的能力。它衡量了测试对非患者的"特异性",即测试能够准确地排除非患者的能力。 特异性的计算公式为:

特异性 = 真阴性(True Negative)/(真阴性 + 假阳性(False Positive))

\(\text{Specificity}= \frac{TN}{FP + TN}\)

注意: 这里不使用 特异性 这一概念,原因是在NGS数据calling中,难以确定真阴性位点的数量,特异性无法计算。

F1_score

F1_score,是评估分类模型性能的一种指标,特别是在二分类问题中。它结合了精确度(Precision)和召回率(Recall)两个指标来提供一个单一的评分,以衡量模型的整体性能。 F1_score 是精确度和召回率的调和平均数,公式为:

\(F1 = 2 \times \frac{\text{Precision} \times \text{Recall}}{\text{Precision} + \text{Recall}}\)

F1_score 的值范围是0到1,1表示完美的精确度和召回率,0表示模型性能很差。

在处理不平衡的数据集时,F1_score 特别有用,因为它同时考虑了精确度和召回率,而不是仅仅关注其中一个。这使得 F1_score 成为一个在多种情况下都相对平衡的性能度量标准。

使用MkDocs+GithubPage 搭建个人博客

使用 MkDocs 的原因是 语雀没有会员的话,即使是(设置过的)互联网访问的文库,新创建的文档他人也无法打开链接,想来还是重新回转到博客了

1. 参考

  • ref1: https://wcowin.work/blog/Mkdocs/mkdocs1.html

  • ref2: https://www.cnblogs.com/chinjinyu/p/17610438.html

  • 配置文件
  • https://zhuanlan.zhihu.com/p/688322635

2. 具体操作

具体操作参考 ref1中的步骤,有几个坑需要注意: 1. 我之前使用过GithuaPage,我没有删除旧项目,而是保留了.git 文件夹,清除了其文件,此时,我的主要分支是 master, 因此 ci.yml 中需要对于的修改:

YAML
 1
 2
 3
 4
 5
 6
 7
 8
 9
10
11
12
13
14
15
16
17
18
19
20
name: ci 
on: # 在什么时候触发工作流
  push: # 在从本地master分支被push到GitHub仓库时
    branches:
      - master
      - main
  pull_request: # 在master分支合并别人提的pr时
    branches:
      - master
      - main
jobs: # 工作流的具体内容
  deploy:
    runs-on: ubuntu-latest # 创建一个新的云端虚拟机 使用最新Ubuntu系统
    steps:
      - uses: actions/checkout@v4 # 先checkout到main分支
      - uses: actions/setup-python@v4 # 再安装Python3和相关环境
        with:
          python-version: 3.x
      - run: pip install mkdocs-material # 使用pip包管理工具安装mkdocs-material
      - run: mkdocs gh-deploy --force # 使用mkdocs-material部署gh-pages分支
  1. 使用 blog 插件,配置 authors 信息时,自23-08之后,.authors.yml 文件路径修改了,默认路径是在 docs 文件夹下:
YAML
1
2
3
4
5
authors:
  biolxy:
    name: biolxy    # Author name
    description: 生物信息工程师 # Author description
    avatar: https://gravatar.com/avatar/d63d3425433de59d2c3e901977a581c7?size=256&cache=1715411947733

1. 原文参考

● 利用贝叶斯定理判断SNV 一个位点所有可能的genotype如下图: ["AA", "CC", "TT", "GG", "AC", "AT", "AG", "CT", "CG", "TG"]

利用贝叶斯定理判断SNV的方法就是根据测序数据(D)计算每一种genotype(G)的概率,即Pr(G|D)。

也就是计算所有十种可能性的概率, 那么,概率最高的就是该位点的genotype。

根据贝叶斯定理计算Pr(G|D)公式如下:

\[Pr(G | D)=Pr(G)*Pr(D | G)/Pr(D)\]

我们的目的是比较不同genotype的概率,因此计算Pr(G)*Pr(D|G)/Pr(D)即可。

\[Pr(G|D)\propto Pr(G)*Pr(D|G)\]

现在有两个问题:

  1. 如何计算Pr(D|G)?
  2. 如何计算P(G)?

1.如何计算Pr(D|G)? 下面通过一个例子来说明计算Pr(D|G)的方法。data如下:

假设G为A1A2,如下:

Pr(D|G)的计算公式如下:

\[Pr(\mathcal{D}|G)=\prod_{i=1..n}Pr(b_{i}|\{A_{1},A_{2}\})=\prod_{i=1..n}\frac{Pr(b_{i}|A_{1})+Pr(b_{i}|A_{2})}{2}\]
\[b_{j}\in\{\mathrm{A},\mathrm{G},\mathrm{A}\}\]

P(b|A)的概率如下, 其中e为对应碱基的质量值:

\[\text{当 }b_i=A_j\quad Pr(b_i|A_j)=1-e_i\]
\[\text{当 }b_i\neq A_j\quad Pr(b_i|A_j)=e_i/3\]

当Genotype=AG时,套用上面的公式,首先分别计算不同碱基对应的结果:

\[Pr(b_1=\mathtt A|\mathtt A\mathtt G)=\quad\frac{1}{2}\left((1-10^{-2})+\frac{10^{-2}}{3}\right)=\quad0.49667\]
\[Pr(b_2=\mathtt G|\mathtt A\mathtt G)=\quad\frac{1}{2}\left(\frac{10^{-1}}{3}+(1-10^{-1})\right)=\quad0.466667\]
\[Pr(b_{3}=\mathtt A|\mathtt A\mathtt G)=\quad\frac{1}{2}\left((1-10^{-5})+\frac{10^{-5}}{3}\right)=\quad0.499997\]

最终的结果如下:

\[Pr({D}|{AG})=Pr(b_1={A}|{AG}) * Pr(b_2={G}|{AG}) * Pr(b_3={A}|{AG}) = 0.49667 * 0.466667 * 0.499997=0.115888\]
  1. 如何计算P(G)?

计算P(G), 就是计算10种可能的genotype的概率, 即Pr(AA),Pr(TT),Pr(CC)等等。

假定参考碱基为G,如果杂合突变率为0.001, 纯合突变率为0.0005。genotype的概率如下: 有了Pr(D|AG)和Pr(G)的概率, Pr(AG|D)就可以计算出来了, 如下:

\[Pr({AG}|{D})= Pr({D}|{AG})Pr({AG})=0.115888*0.001=0.000116\]

同理可以计算出其他genotype的概率, 如下:

因此Pr(AG)是10种genotype的概率最高的, 该位点的genotype为AG。

实际SNV calling的方法,可能还有很多细节, 或者其他方法,我这里分享的东西也可能存在不少错误,如果你发现了, 欢迎留言。

2. 代码实现

Python
 1
 2
 3
 4
 5
 6
 7
 8
 9
10
11
12
13
14
15
16
17
18
19
20
21
22
23
24
25
26
27
28
29
30
31
32
33
34
35
36
37
38
39
40
41
42
43
44
45
46
47
48
49
50
51
52
53
54
55
56
57
58
59
60
61
62
63
64
65
66
67
68
69
import math
import itertools as it

# 计算基因型的先验概率
def calc_prior_prob(ref_base, g1, g2):
    # 假设已知的参数
    # REF_BASE = 'G'  # 参考碱基
    HET_RATE = 0.001  # 杂合突变率
    HOM_RATE = 0.0005  # 纯合突变率
    if g1 == g2 == ref_base:
        return 1.0 - HET_RATE - HOM_RATE
    elif g1 != g2:
        return HET_RATE
    else:
        return HOM_RATE

# 根据PHRED质量值计算错误率
def get_error_rate(qual):
    # 将PHRED分数转换为概率
    error_rate = 10 ** (-qual / 10.0)
    return error_rate

# 计算读取数据的条件概率
def calc_likelihood2(data, g1, g2, base_qualities):
    likelihood = 1.0
    for base, qual in zip(data, base_qualities):
        p_err = get_error_rate(qual)
        p_A1 = get_genotype_rate(base, p_err, g1)
        p_A2 = get_genotype_rate(base, p_err, g2)
        likelihood *= (p_A1 + p_A2) / 2
    return likelihood


def get_genotype_rate(base, p_err, genotype):
    if base == genotype:
        return 1.0 - p_err
    else:
        return p_err / 3

# 计算后验概率
def calc_posterior_prob(ref_base, data, base_qualities):
    probs = {}
    genotype_list = get_genotype(ref_base, data)
    for g1,g2 in genotype_list:
        prior = calc_prior_prob(ref_base, g1, g2)
        likelihood = calc_likelihood2(data, g1, g2, base_qualities)
        probs[(g1, g2)] = prior * likelihood
    return probs


def get_genotype(ref_base, data):
    res = []
    tmp = list(set(data))
    if ref_base not in tmp:
        tmp.append(ref_base)
    for e in it.combinations_with_replacement(tmp, 2):
        res.append(e)
    return res


# 使用示例
REF_BASE = 'G'  # 参考碱基
data = ['A', 'G', 'A']
base_qualities = [20, 10, 50]
posterior_probs = calc_posterior_prob(REF_BASE, data, base_qualities)

# 输出每种基因型的后验概率
for genotype, prob in sorted(posterior_probs.items(), key=lambda x: x[1], reverse=True):
    print(f"Genotype {genotype}: {prob:.6f}")

fq2fa 尝试使用 fast_zlib

起因

看到适用于绝大部分临床NGS数据分析的底层高度性能优化方案想测试一下效果

1. 查看 fq2fa.c 文件

cat fq2fa.c

C
 1
 2
 3
 4
 5
 6
 7
 8
 9
10
11
12
13
14
15
16
17
18
19
20
21
22
23
24
25
26
27
28
29
30
31
32
33
34
35
36
37
38
39
40
#include <stdio.h>
#include <zlib.h>
#include "klib/kseq.h"


KSEQ_INIT(gzFile, gzread)

int main(int argc, char *argv[])
{

        gzFile fp;
        gzFile fo;
        if (argc < 2 ){
            return -1;
        }
        if ( argc == 3 ){
            fo = gzopen (argv[2], "wb");
        }

        kseq_t *seq;
        int l;
        if (argc == 1){
            fprintf(stderr, "Usage: %s <in.fasta|in.fasta.gz>\n", argv[0]);
            return 1;
        }

        fp = gzopen(argv[1], "r");
        seq = kseq_init(fp); // 分配内存给seq
        while( (l = kseq_read(seq)) >= 0){ //读取数据到seq中
            gzprintf(fo, "%s", seq->name.s);
            gzprintf(fo, "%s", seq->seq.s);
        }

        kseq_destroy(seq); //释放内存
        gzclose(fp);
        if (argc == 3) gzclose(fo);
        return 0;


}

2. 系统安装zlib

Bash
1
yum install -y zlib1g-dev zlib zlib-devel
Text Only
1
apt-get install -y zlib1g zlib1g.dev zlib

3. 下载fast_zlib, 下载zlib

  • 下载 klib
    Text Only
    1
    git clone https://github.com/attractivechaos/klib.git
    
    移动到 fq2fa 文件夹
Bash
1
git clone https://github.com/gildor2/fast_zlib.git
  • http://www.zlib.net/
  • 下载 http://www.zlib.net/zlib-1.2.12.tar.gz
    Bash
    1
    2
    $ sha256sum zlib-1.2.12.tar.gz 
    91844808532e5ce316b3c010929493c0244f3d37593afd6de04f71821d5136d9  zlib-1.2.12.tar.gz
    

4. 修改zlib代码

  1. 复制 fast_zlib/Sources/match.hzlib-1.2.12
  2. cd zlib-1.2.12
  3. mv deflate.c deflate.old.c
  4. vim deflate.c
  5. 写入:
C
 1
 2
 3
 4
 5
 6
 7
 8
 9
10
11
#define ASMV
#include "deflate.old.c"

#undef local
#define local

#include "match.h"

void match_init()
{
}

5. 编译安装 zlib-1.2.12

Bash
1
2
./configure --prefix=/home/lixy/Clion/fast_zlib_test/zlib-1.2.12/build --shared --static
make && make install

6. 编译链接 fq2fa.c

下载klib

Text Only
1
git clone git@github.com:attractivechaos/klib.git
Text Only
1
2
gcc -o fq2fa_zlib fq2fa.c -lz -Lzlib 
gcc -o fq2fa_fast_zlib fq2fa.c -I/home/lixy/Clion/fast_zlib_test/zlib-1.2.12/build/include -L/home/lixy/Clion/fast_zlib_test/zlib-1.2.12/build/lib -lz

查看 MD5:

Text Only
1
2
3
$  md5sum fq2fa_zlib fq2fa_fast_zlib 
4c03dc0377470f6a589e1bb4a9ffb7b0  fq2fa_zlib
e237f08440a7db5821aa902c5a8cfc1a  fq2fa_fast_zlib

7. 测试 zlib 和 fast_zlib 版本各自的速度

生成测试文件, in.fq.gz 太小,体现不出速度差异

Bash
1
2
3
for i in $(seq 1 4000);do cat in.fq.gz >> test.fq.gz ;done
$ zcat in.fq.gz |wc -l 
4000000

fq2fa_zlib:

Bash
 1
 2
 3
 4
 5
 6
 7
 8
 9
10
11
12
13
14
15
16
17
18
19
20
21
22
23
24
$ /bin/time -v ./fq2fa_zlib test.fq.gz test_zlib.fa.gz  
    Command being timed: "./fq2fa_zlib test.fq.gz test_zlib.fa.gz"
    User time (seconds): 35.82
    System time (seconds): 0.17
    Percent of CPU this job got: 99%
    Elapsed (wall clock) time (h:mm:ss or m:ss): 0:36.29
    Average shared text size (kbytes): 0
    Average unshared data size (kbytes): 0
    Average stack size (kbytes): 0
    Average total size (kbytes): 0
    Maximum resident set size (kbytes): 980
    Average resident set size (kbytes): 0
    Major (requiring I/O) page faults: 1
    Minor (reclaiming a frame) page faults: 289
    Voluntary context switches: 14
    Involuntary context switches: 813
    Swaps: 0
    File system inputs: 205752
    File system outputs: 93184
    Socket messages sent: 0
    Socket messages received: 0
    Signals delivered: 0
    Page size (bytes): 4096
    Exit status: 0

fq2fa_fast_zlib:

Bash
 1
 2
 3
 4
 5
 6
 7
 8
 9
10
11
12
13
14
15
16
17
18
19
20
21
22
23
24
$ /bin/time -v ./fq2fa_fast_zlib test.fq.gz test_fast_zlib.fa.gz  
    Command being timed: "./fq2fa_fast_zlib test.fq.gz test_fast_zlib.fa.gz"
    User time (seconds): 34.85
    System time (seconds): 0.11
    Percent of CPU this job got: 99%
    Elapsed (wall clock) time (h:mm:ss or m:ss): 0:35.31
    Average shared text size (kbytes): 0
    Average unshared data size (kbytes): 0
    Average stack size (kbytes): 0
    Average total size (kbytes): 0
    Maximum resident set size (kbytes): 980
    Average resident set size (kbytes): 0
    Major (requiring I/O) page faults: 0
    Minor (reclaiming a frame) page faults: 290
    Voluntary context switches: 5
    Involuntary context switches: 730
    Swaps: 0
    File system inputs: 8
    File system outputs: 93184
    Socket messages sent: 0
    Socket messages received: 0
    Signals delivered: 0
    Page size (bytes): 4096
    Exit status: 0

查看输出结果一致性:

Bash
1
2
3
$ md5sum test_zlib.fa.gz test_fast_zlib.fa.gz  
5bd3de8cf81c78962aa7100da6ab2719  test_zlib.fa.gz
5bd3de8cf81c78962aa7100da6ab2719  test_fast_zlib.fa.gz

8. 疑问?

  • fast_zlib 对 zlib的优化是否成功? 如果成功了,为什么两个版本的程序速度没有差异

9. 听从大佬建议,使用静态库

或者 直接用

Bash
1
2
3
4
5
gcc -o fq2fa_fast_zlib fq2fa.c /home/lixy/Clion/fast_zlib_test/zlib-1.2.12/build/lib/libz.a

$ md5sum fq2fa_zlib fq2fa_fast_zlib               
4c03dc0377470f6a589e1bb4a9ffb7b0  fq2fa_zlib
262db896e101b93ca1f2b0b7b6ee8ddd  fq2fa_fast_zlib
Bash
 1
 2
 3
 4
 5
 6
 7
 8
 9
10
11
12
13
14
15
16
17
18
19
20
21
22
23
24
$ /bin/time -v ./fq2fa_fast_zlib test.fq.gz test_fast_zlib.fa.gz                          
    Command being timed: "./fq2fa_fast_zlib test.fq.gz test_fast_zlib.fa.gz"
    User time (seconds): 24.68
    System time (seconds): 0.12
    Percent of CPU this job got: 99%
    Elapsed (wall clock) time (h:mm:ss or m:ss): 0:24.99
    Average shared text size (kbytes): 0
    Average unshared data size (kbytes): 0
    Average stack size (kbytes): 0
    Average total size (kbytes): 0
    Maximum resident set size (kbytes): 1012
    Average resident set size (kbytes): 0
    Major (requiring I/O) page faults: 0
    Minor (reclaiming a frame) page faults: 292
    Voluntary context switches: 6
    Involuntary context switches: 535
    Swaps: 0
    File system inputs: 0
    File system outputs: 93240
    Socket messages sent: 0
    Socket messages received: 0
    Signals delivered: 0
    Page size (bytes): 4096
    Exit status: 0

可以看到,速度明显快了⅓

10. 发现异常

  • 上述测试是在Centos 7.9, 2 CPUs, 4G MEM 环境下测试
  • 切换至 Ubuntu 18.04, 36 CPUs, 128G MEM / Ubuntu 20.04, 32 CPUs, 128G MEM后,发现 优化后的速度还不如不优化
Bash
1
2
for i in $(seq 1 10);do printf "test.fq.gz ";done
cat test.fq.gz test.fq.gz test.fq.gz test.fq.gz test.fq.gz test.fq.gz test.fq.gz test.fq.gz test.fq.gz test.fq.gz > aa.fq.gz 
Bash
 1
 2
 3
 4
 5
 6
 7
 8
 9
10
11
12
13
14
15
16
17
18
19
20
21
22
23
24
$ /usr/bin/time -v ./fq2fa_fast_zlib aa.fq.gz aa_fast_zlib.fa.gz 
    Command being timed: "./fq2fa_fast_zlib aa.fq.gz aa_fast_zlib.fa.gz"
    User time (seconds): 19.61
    System time (seconds): 0.02
    Percent of CPU this job got: 99%
    Elapsed (wall clock) time (h:mm:ss or m:ss): 0:19.63
    Average shared text size (kbytes): 0
    Average unshared data size (kbytes): 0
    Average stack size (kbytes): 0
    Average total size (kbytes): 0
    Maximum resident set size (kbytes): 1888
    Average resident set size (kbytes): 0
    Major (requiring I/O) page faults: 0
    Minor (reclaiming a frame) page faults: 152
    Voluntary context switches: 1
    Involuntary context switches: 25
    Swaps: 0
    File system inputs: 0
    File system outputs: 93128
    Socket messages sent: 0
    Socket messages received: 0
    Signals delivered: 0
    Page size (bytes): 4096
    Exit status: 0
Bash
 1
 2
 3
 4
 5
 6
 7
 8
 9
10
11
12
13
14
15
16
17
18
19
20
21
22
23
24
$ /usr/bin/time -v ./fq2fa_zlib aa.fq.gz aa_zlib.fa.gz     
    Command being timed: "./fq2fa_zlib aa.fq.gz aa_zlib.fa.gz"
    User time (seconds): 18.20
    System time (seconds): 0.03
    Percent of CPU this job got: 100%
    Elapsed (wall clock) time (h:mm:ss or m:ss): 0:18.24
    Average shared text size (kbytes): 0
    Average unshared data size (kbytes): 0
    Average stack size (kbytes): 0
    Average total size (kbytes): 0
    Maximum resident set size (kbytes): 2040
    Average resident set size (kbytes): 0
    Major (requiring I/O) page faults: 0
    Minor (reclaiming a frame) page faults: 160
    Voluntary context switches: 1
    Involuntary context switches: 23
    Swaps: 0
    File system inputs: 0
    File system outputs: 93064
    Socket messages sent: 0
    Socket messages received: 0
    Signals delivered: 0
    Page size (bytes): 4096
    Exit status: 0
  • 推测:
  • Ubuntu 系统上fast_zliblongest_match 函数的实现 与 CentOS 系统上的不同,所以相同的修改效果不显著,甚至是无用的
  • 更换的两个Ubuntu系统均为多核心CPU, 高内存服务器,使得 fast_zliblongest_match 函数的优化仅能在 较少CPU和较少内存是体现优势

11. 解决 10 提出的异常

11.1 重新编译,保持单一变量

  • 上诉两个程序的编译命令不同,不符合单一变量原则
  • 解决:
  • 解压 zlib-1.2.12.tar.gz
  • cp -r zlib-1.2.12 fast_zlib-1.2.12
  • 不修改 zlib 代码,直接编译 zlib-1.2.12
  • 按 4 5 步骤,修改zlib代码,编译 fast_zlib-1.2.12
  • 分别编译链接 fq2fc
    • gcc -o fq2fa_fast_zlib fq2fa.c /home/lixy/myproject/fast_zlib_test/fast_zlib-1.2.12/build/lib/libz.a -I/home/lixy/myproject/fast_zlib_test/fast_zlib-1.2.12/build/include
    • gcc -o fq2fa_zlib fq2fa.c /home/lixy/myproject/fast_zlib_test/zlib-1.2.12/build/lib/libz.a -I/home/lixy/myproject/fast_zlib_test/zlib-1.2.12/build/include

测试两个文件的速度:

Bash
 1
 2
 3
 4
 5
 6
 7
 8
 9
10
11
12
13
14
15
16
17
18
19
20
21
22
23
24
$ /usr/bin/time -v ./fq2fa_zlib aa.fq.gz aa_zlib.fa.gz
    Command being timed: "./fq2fa_zlib aa.fq.gz aa_zlib.fa.gz"
    User time (seconds): 28.85
    System time (seconds): 0.05
    Percent of CPU this job got: 99%
    Elapsed (wall clock) time (h:mm:ss or m:ss): 0:28.91
    Average shared text size (kbytes): 0
    Average unshared data size (kbytes): 0
    Average stack size (kbytes): 0
    Average total size (kbytes): 0
    Maximum resident set size (kbytes): 1892
    Average resident set size (kbytes): 0
    Major (requiring I/O) page faults: 0
    Minor (reclaiming a frame) page faults: 153
    Voluntary context switches: 1
    Involuntary context switches: 37
    Swaps: 0
    File system inputs: 0
    File system outputs: 93064
    Socket messages sent: 0
    Socket messages received: 0
    Signals delivered: 0
    Page size (bytes): 4096
    Exit status: 0
Bash
 1
 2
 3
 4
 5
 6
 7
 8
 9
10
11
12
13
14
15
16
17
18
19
20
21
22
23
24
$ /usr/bin/time -v ./fq2fa_fast_zlib aa.fq.gz aa_fast_zlib.fa.gz 
    Command being timed: "./fq2fa_fast_zlib aa.fq.gz aa_fast_zlib.fa.gz"
    User time (seconds): 19.87
    System time (seconds): 0.05
    Percent of CPU this job got: 99%
    Elapsed (wall clock) time (h:mm:ss or m:ss): 0:19.92
    Average shared text size (kbytes): 0
    Average unshared data size (kbytes): 0
    Average stack size (kbytes): 0
    Average total size (kbytes): 0
    Maximum resident set size (kbytes): 1948
    Average resident set size (kbytes): 0
    Major (requiring I/O) page faults: 0
    Minor (reclaiming a frame) page faults: 152
    Voluntary context switches: 1
    Involuntary context switches: 26
    Swaps: 0
    File system inputs: 0
    File system outputs: 93128
    Socket messages sent: 0
    Socket messages received: 0
    Signals delivered: 0
    Page size (bytes): 4096
    Exit status: 0
  • 结论:在 ubuntu系统中,fast_zlib 项目对 zlib代码的修改,依旧有较大的速度提升

    • 新的问题:在 ubuntu系统中,直接使用 gcc -o fq2fa_zlib_u fq2fa.c -lz -Lzlib 编译链接,速度比 fast_zlib 修改版的尽然还要稍微快一点,原因是什么?
    • 使用 -lz -Lzlib 时候,使用的是系统的 zlib, 该版本比 zlib-1.2.12 有较大的速度提升 ?
Bash
 1
 2
 3
 4
 5
 6
 7
 8
 9
10
11
12
13
14
15
16
17
18
19
20
21
22
23
24
$ /usr/bin/time -v ./fq2fa_zlib-ubuntu aa.fq.gz aa_zlib-ubuntu.fa.gz
    Command being timed: "./fq2fa_zlib-ubuntu aa.fq.gz aa_zlib-ubuntu.fa.gz"
    User time (seconds): 18.59
    System time (seconds): 0.07
    Percent of CPU this job got: 99%
    Elapsed (wall clock) time (h:mm:ss or m:ss): 0:18.68
    Average shared text size (kbytes): 0
    Average unshared data size (kbytes): 0
    Average stack size (kbytes): 0
    Average total size (kbytes): 0
    Maximum resident set size (kbytes): 2020
    Average resident set size (kbytes): 0
    Major (requiring I/O) page faults: 0
    Minor (reclaiming a frame) page faults: 158
    Voluntary context switches: 2
    Involuntary context switches: 24
    Swaps: 0
    File system inputs: 0
    File system outputs: 93064
    Socket messages sent: 0
    Socket messages received: 0
    Signals delivered: 0
    Page size (bytes): 4096
    Exit status: 0

11.2 查看系统(ubuntu)中zlib的版本

Bash
 1
 2
 3
 4
 5
 6
 7
 8
 9
10
11
12
13
14
$ cat /usr/lib/x86_64-linux-gnu/pkgconfig/zlib.pc
prefix=/usr
exec_prefix=${prefix}
libdir=${prefix}/lib/x86_64-linux-gnu
sharedlibdir=${libdir}
includedir=${prefix}/include

Name: zlib
Description: zlib compression library
Version: 1.2.11

Requires:
Libs: -L${libdir} -L${sharedlibdir} -lz
Cflags: -I${includedir}

11.3 那么,zlib-1.2.11 会比 zlib-1.2.12 更快吗?

测试如下:

Text Only
1
axel -n 8 https://github.com/madler/zlib/archive/refs/tags/v1.2.11.tar.gz
Text Only
1
2
$ md5sum zlib-1.2.11.tar.gz 
0095d2d2d1f3442ce1318336637b695f  zlib-1.2.11.tar.gz

编译安装

Text Only
1
2
3
mkdir build
./configure --prefix=/home/lixy/myproject/fast_zlib_test/zlib-1.2.11/build  --shared --static
make && make install

编译

Bash
1
2
3
4
5
6
7
8
9
gcc -o fq2fa_zlib-1.2.12 fq2fa.c /home/lixy/myproject/fast_zlib_test/zlib-1.2.12/build/lib/libz.a -I/home/lixy/myproject/fast_zlib_test/zlib-1.2.12/build/include

gcc -o fq2fa_zlib-1.2.11 fq2fa.c /home/lixy/myproject/fast_zlib_test/zlib-1.2.11/build/lib/libz.a -I/home/lixy/myproject/fast_zlib_test/zlib-1.2.11/build/include

gcc -o fq2fa_zlib-ubuntu fq2fa.c -lz -Lzlib

(
    gcc -o fq2fa_zlib-ubuntu fq2fa.c /usr/lib/x86_64-linux-gnu/libz.a -I/usr/include/
)

Bash
 1
 2
 3
 4
 5
 6
 7
 8
 9
10
11
12
13
14
15
16
17
18
19
20
21
22
23
24
25
26
27
28
29
30
31
32
33
34
35
36
37
38
39
40
41
42
43
44
45
46
47
48
49
50
51
52
53
54
55
56
57
58
59
60
61
62
63
64
65
66
67
68
69
70
71
72
73
74
75
76
77
$ /usr/bin/time -v ./fq2fa_zlib-1.2.11 aa.fq.gz aa_zlib-1.2.11.fa.gz  
    Command being timed: "./fq2fa_zlib-1.2.11 aa.fq.gz aa_zlib-1.2.11.fa.gz"
    User time (seconds): 29.69
    System time (seconds): 0.03
    Percent of CPU this job got: 99%
    Elapsed (wall clock) time (h:mm:ss or m:ss): 0:29.73
    Average shared text size (kbytes): 0
    Average unshared data size (kbytes): 0
    Average stack size (kbytes): 0
    Average total size (kbytes): 0
    Maximum resident set size (kbytes): 1948
    Average resident set size (kbytes): 0
    Major (requiring I/O) page faults: 0
    Minor (reclaiming a frame) page faults: 153
    Voluntary context switches: 1
    Involuntary context switches: 38
    Swaps: 0
    File system inputs: 0
    File system outputs: 93064
    Socket messages sent: 0
    Socket messages received: 0
    Signals delivered: 0
    Page size (bytes): 4096
    Exit status: 0


$ /usr/bin/time -v ./fq2fa_zlib-1.2.12 aa.fq.gz aa_zlib-1.2.12.fa.gz   
    Command being timed: "./fq2fa_zlib-1.2.12 aa.fq.gz aa_zlib-1.2.12.fa.gz"
    User time (seconds): 29.02
    System time (seconds): 0.07
    Percent of CPU this job got: 99%
    Elapsed (wall clock) time (h:mm:ss or m:ss): 0:29.10
    Average shared text size (kbytes): 0
    Average unshared data size (kbytes): 0
    Average stack size (kbytes): 0
    Average total size (kbytes): 0
    Maximum resident set size (kbytes): 1948
    Average resident set size (kbytes): 0
    Major (requiring I/O) page faults: 0
    Minor (reclaiming a frame) page faults: 153
    Voluntary context switches: 2
    Involuntary context switches: 39
    Swaps: 0
    File system inputs: 0
    File system outputs: 93064
    Socket messages sent: 0
    Socket messages received: 0
    Signals delivered: 0
    Page size (bytes): 4096
    Exit status: 0


$ /usr/bin/time -v ./fq2fa_zlib-ubuntu aa.fq.gz aa_zlib-ubuntu.fa.gz 
    Command being timed: "./fq2fa_zlib-ubuntu aa.fq.gz aa_zlib-ubuntu.fa.gz"
    User time (seconds): 18.58
    System time (seconds): 0.03
    Percent of CPU this job got: 100%
    Elapsed (wall clock) time (h:mm:ss or m:ss): 0:18.61
    Average shared text size (kbytes): 0
    Average unshared data size (kbytes): 0
    Average stack size (kbytes): 0
    Average total size (kbytes): 0
    Maximum resident set size (kbytes): 2008
    Average resident set size (kbytes): 0
    Major (requiring I/O) page faults: 0
    Minor (reclaiming a frame) page faults: 157
    Voluntary context switches: 1
    Involuntary context switches: 22
    Swaps: 0
    File system inputs: 0
    File system outputs: 93064
    Socket messages sent: 0
    Socket messages received: 0
    Signals delivered: 0
    Page size (bytes): 4096
    Exit status: 0
  • 发现,我们编译的 zlib-1.2.11 速度和 zlib-1.2.12 一样,但是却比使用系统默认zlib的版本慢很多
  • 难道是 zlib 在编译的过程中,可以加入一些优化参数?
  • 后续我在 一个docker image 中测试了几种版本的区别,发现,现在 ubuntu 中安装 zlib 相关的包,再 gcc -o fq2fa_zlib-ubuntu fq2fa.c -lz -Lzlib 出的程序,确实比 使用 zlib-1.2.11 速度和 zlib-1.2.12 快,原因未知。

12 为什么系统自带的zlib(deb 1.2.11)比我们手动编译的要快

12.1 查看 apt 安装的软件是什么版本,下载到本地,看一下configure.log

Bash
1
2
3
4
5
6
$ apt list --installed | rg zlib

WARNING: apt does not have a stable CLI interface. Use with caution in scripts.

zlib1g-dev/focal-updates,focal-security,now 1:1.2.11.dfsg-2ubuntu1.3 amd64 [installed]
zlib1g/focal-updates,focal-security,now 1:1.2.11.dfsg-2ubuntu1.3 amd64 [installed,automatic]

网上搜索ubuntu 中得这些包,找到了 build.log 文件 - https://www.ubuntuupdates.org/pm/zlib1g-dev - https://www.ubuntuupdates.org/pm/zlib1g

  • https://launchpadlibrarian.net/593215494/buildlog_ubuntu-focal-amd64.zlib_1%3A1.2.11.dfsg-2ubuntu1.3_BUILDING.txt.gz

build.log 文件 编译命令就是:

Text Only
1
AR=ar CC="x86_64-linux-gnu-gcc" CFLAGS="`dpkg-buildflags --get CFLAGS` `dpkg-buildflags --get CPPFLAGS` -Wall -D_REENTRANT -O3 -DUNALIGNED_OK" LDFLAGS="`dpkg-buildflags --get LDFLAGS`" uname=GNU ./configure --shared --prefix=/usr --libdir=\${prefix}/lib/x86_64-linux-gnu

创建 build.sh

Bash
 1
 2
 3
 4
 5
 6
 7
 8
 9
10
11
12
13
14
15
16
17
18
19
20
21
#!/bin/bash
#@File    :   build.sh
#@Time    :   2022/08/18 10:41:29
#@Author  :   biolxy
#@Version :   1.0
#@Contact :   biolxy@aliyun.com
#@Desc    :   None

SCRIPT_FOLDER=$(cd "$(dirname "$0")";pwd)

make distclean
test -d _build && rm -rf _build
mkdir _build


# --static
# --shared

AR=ar CC="x86_64-linux-gnu-gcc" CFLAGS="`dpkg-buildflags --get CFLAGS` `dpkg-buildflags --get CPPFLAGS` -Wall -D_REENTRANT -O3 -DUNALIGNED_OK" LDFLAGS="`dpkg-buildflags --get LDFLAGS`" uname=GNU ./configure --shared --prefix=${SCRIPT_FOLDER}/_build

make && make install

执行 bash ./build 重新编译链接程序,发现 手动编译的程序的速度也来到了 22s, 可以确定确实是不同的编译参数导致zlib库文件的执行效率不同

12.2 fast_zlib 的优化 是否能与 ubuntu zlib的编译参数一起使用

  • 可以,但是没有效,编译出的 fq2fa_fast_zlib-1.2.11 速度还是在 24s, 和未使用 ubuntu zlib的编译参数 前的速度一致

13 测试 zlib-1.3.1 和 fast_zlib-1.2.13 版本各自的速度

  • https://github.com/biolxy/zlib/tree/fast_zlib-v1.2.13

最近 zlib 升级到了 1.3.1 , fast_zlib 也升级到了 zlib-1.2.13

13.1 编译zlib 时不使用优化参数

Bash
1
./configure --prefix=/fast_zlib_test/zlib-1.3.1/_build --shared --static
Bash
 1
 2
 3
 4
 5
 6
 7
 8
 9
10
11
12
13
14
15
16
17
18
19
20
21
22
23
24
25
26
27
28
29
30
31
32
33
34
35
36
37
38
39
40
41
42
43
44
45
46
47
48
49
$ /usr/bin/time -v ./fq2fa_fast_zlib-1.2.13 in.fq.gz out_fq2fa_zlib-1.2.13.fa.gz 
    Command being timed: "./fq2fa_fast_zlib-1.2.13 in.fq.gz out_fq2fa_zlib-1.2.13.fa.gz"
    User time (seconds): 24.58
    System time (seconds): 0.10
    Percent of CPU this job got: 99%
    Elapsed (wall clock) time (h:mm:ss or m:ss): 0:24.74
    Average shared text size (kbytes): 0
    Average unshared data size (kbytes): 0
    Average stack size (kbytes): 0
    Average total size (kbytes): 0
    Maximum resident set size (kbytes): 1860
    Average resident set size (kbytes): 0
    Major (requiring I/O) page faults: 0
    Minor (reclaiming a frame) page faults: 357
    Voluntary context switches: 144
    Involuntary context switches: 166
    Swaps: 0
    File system inputs: 0
    File system outputs: 92624
    Socket messages sent: 0
    Socket messages received: 0
    Signals delivered: 0
    Page size (bytes): 4096
    Exit status: 0

$ /usr/bin/time -v ./fq2fa_zlib-1.3.1 in.fq.gz out_fq2fa_zlib-1.3.1.fa.gz
    Command being timed: "./fq2fa_zlib-1.3.1 in.fq.gz out_fq2fa_zlib-1.3.1.fa.gz"
    User time (seconds): 37.16
    System time (seconds): 0.13
    Percent of CPU this job got: 99%
    Elapsed (wall clock) time (h:mm:ss or m:ss): 0:37.48
    Average shared text size (kbytes): 0
    Average unshared data size (kbytes): 0
    Average stack size (kbytes): 0
    Average total size (kbytes): 0
    Maximum resident set size (kbytes): 1828
    Average resident set size (kbytes): 0
    Major (requiring I/O) page faults: 0
    Minor (reclaiming a frame) page faults: 257
    Voluntary context switches: 154
    Involuntary context switches: 300
    Swaps: 0
    File system inputs: 0
    File system outputs: 92608
    Socket messages sent: 0
    Socket messages received: 0
    Signals delivered: 0
    Page size (bytes): 4096
    Exit status: 0

13.2 编译时添加 -03 优化后

Bash
 1
 2
 3
 4
 5
 6
 7
 8
 9
10
11
12
13
14
15
16
17
18
19
20
21
22
23
24
25
26
27
28
29
30
31
32
33
34
35
36
37
38
39
40
41
42
43
44
45
46
47
48
49
50
$ /usr/bin/time -v ./fq2fa_fast_zlib-1.2.13 in.fq.gz out_fq2fa_zlib-1.2.13.fa.gz
    Command being timed: "./fq2fa_fast_zlib-1.2.13 in.fq.gz out_fq2fa_zlib-1.2.13.fa.gz"
    User time (seconds): 23.62
    System time (seconds): 0.12
    Percent of CPU this job got: 99%
    Elapsed (wall clock) time (h:mm:ss or m:ss): 0:23.84
    Average shared text size (kbytes): 0
    Average unshared data size (kbytes): 0
    Average stack size (kbytes): 0
    Average total size (kbytes): 0
    Maximum resident set size (kbytes): 1852
    Average resident set size (kbytes): 0
    Major (requiring I/O) page faults: 0
    Minor (reclaiming a frame) page faults: 152
    Voluntary context switches: 188
    Involuntary context switches: 163
    Swaps: 0
    File system inputs: 0
    File system outputs: 92624
    Socket messages sent: 0
    Socket messages received: 0
    Signals delivered: 0
    Page size (bytes): 4096
    Exit status: 0


$ /usr/bin/time -v ./fq2fa_zlib-1.3.1 in.fq.gz out_fq2fa_zlib-1.3.1.fa.gz
    Command being timed: "./fq2fa_zlib-1.3.1 in.fq.gz out_fq2fa_zlib-1.3.1.fa.gz"
    User time (seconds): 21.15
    System time (seconds): 0.10
    Percent of CPU this job got: 99%
    Elapsed (wall clock) time (h:mm:ss or m:ss): 0:21.42
    Average shared text size (kbytes): 0
    Average unshared data size (kbytes): 0
    Average stack size (kbytes): 0
    Average total size (kbytes): 0
    Maximum resident set size (kbytes): 1856
    Average resident set size (kbytes): 0
    Major (requiring I/O) page faults: 0
    Minor (reclaiming a frame) page faults: 357
    Voluntary context switches: 58
    Involuntary context switches: 191
    Swaps: 0
    File system inputs: 0
    File system outputs: 92608
    Socket messages sent: 0
    Socket messages received: 0
    Signals delivered: 0
    Page size (bytes): 4096
    Exit status: 0
  • 结论1: 编译zlib时不使用 -03时, fast_zlib-1.2.13 和 zlib-1.3.1 耗时比是 24.74 / 37.48 = 0.6601 , 可节约 ⅓ 的时间
  • 结论2: 编译zlib时使用 -03时, fast_zlib-1.2.13 和 zlib-1.3.1 耗时比是 23.84 / 21.42, 不能节约时间
  • 建议: 以后写c/cpp项目多使用 -O3

生物信息学习技术路线(生信指月录)

1. Linux

推荐 Linux就该这么学 (0-5章节,其他的可选择性学习)

  1. 要求:
    1. 掌握 shell 基础语法
      1. Linux基础命令
      2. cd, ls, mkdir, pwd, time, df, cp, rm, sed, awk, wc, head, tail, more, history等
    2. 目录如下:
      1. 第0章 咱们先来谈谈为什么要学习Linux系统
      2. 第1章 动手部署一台Linux操作系统
      3. 第2章 新手必须掌握的Linux命令
      4. 第3章 管道符、重定向与环境变量
      5. 第4章 Vim编辑器与Shell命令脚本
      6. 第5章 用户身份与文件权限

2. Python

  1. 掌握 基础语法,条件判断,数据类型,简单的数据结构
  2. 熟悉常用模块:sys, os, pandas, json, Bio, numpy, seaborn, pysam, argparse等
  3. 使用Python 读写文件(xls, xlsx, txt等文件)
  4. 了解 迭代器,生成器,装饰器等概念,并描述其适用的场景
  5. python2 和 python3 中 range() 函数的区别
  6. 可以被next()函数调用并不断返回下一个值的对象称为迭代器:Iterator (ref: https://www.liaoxuefeng.com/wiki/1016959663602400/1017323698112640)
  7. 在Python中,这种一边循环一边计算的机制,称为生成器:generator (ref: https://www.liaoxuefeng.com/wiki/1016959663602400/1017318207388128) 熟悉 类 和 实例的概念,类函数,静态函数
  8. 可选:
    1. Python 多线程操作
      1. 使用 pymysql 操作数据库
      2. 使用 python-docx等操作数据库
      3. 常见的设计模式及其使用场景
      4. Python 数据结构与算法
      5. 陈斌老师 《数据结构与算法》B站课程
      6. 课件: 链接: https://pan.baidu.com/s/1srvCWOLsxEn3mOq1_TCmhQ 提取码: wtji

3. 生物信息学课程

  1. 了解相关概念, 专有名词
  2. 了解相关概念背后的 生物信息算法,统计原理
  3. 【 山东大学】生物信息学 B站课程
  4. 【北京大学】生物信息学:导论与方法 B站课程
  5. 统计学 ⅰ. https://www.yuque.com/biolxy/bioinfo/zgl1ml

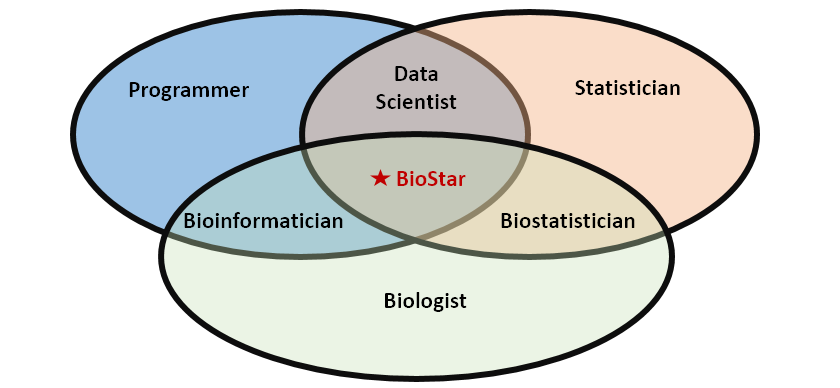
4. BioStar 实操练习 https://www.biostarhandbook.com/

  • 可以看生信媛翻译的 BIOSTAR课程

5. 肿瘤外显子数据分析指南

  • https://www.yuque.com/biotrainee/wes

sad

获取启动子序列

获取启动子序列

  1. 获取物种基因组序列genome.fa文件
  2. 获取物种注释信息gff文件

输入参数: positionFile, genomeFa, outfa (pos坐标文件,包含四列 chrom start end strand)

使用Python脚本

Python
 1
 2
 3
 4
 5
 6
 7
 8
 9
10
11
12
13
14
15
16
17
18
19
20
21
22
23
24
25
26
27
28
29
30
31
32
33
34
35
36
37
38
39
40
41
42
43
44
45
46
47
48
49
50
51
52
53
54
55
56
57
58
59
60
61
62
63
64
65
66
67
#!/usr/bin/env python
# -*- encoding: utf-8 -*-
'''
@File    :   Promoter.py
@Time    :   2021/08/15 20:16:07
@Author  :   biolxy 
@Version :   1.0
@Contact :   biolxy@aliyun.com
@Desc    :   None
@Usage   :   python Promoter.py pos.Lee.txt /home/lixy/soybean/other/glyma.Lee.gnm1.BXNC.genome_main.fna out.Lee.fa
'''
from Bio.Seq import Seq
from Bio.SeqRecord import SeqRecord
from Bio import SeqIO
import sys


class Promoter(object):
    @staticmethod
    def get_promoter_by_genome(positionFile, genomeFa, outfa, length=2000):
        """positionFile
        Chr20   35557820    35562522    +

        length: 2000
        """
        dict1 = {}
        pos_list = Promoter.get_pos_list(positionFile)
        for seq_record in SeqIO.parse(genomeFa, "fasta"):
            seqid = str(seq_record.id)
            for tmp_l in pos_list:
                if seqid == tmp_l[0]:
                    seq = seq_record.seq
                    s = int(tmp_l[1]) - length
                    e = int(tmp_l[1])

                    if '-' == tmp_l[3]:
                        s = int(tmp_l[2])
                        e = int(tmp_l[2]) + length
                    # print(s, e)
                    seq = seq[s:e]
                    if '-' == tmp_l[3]:
                        seq = seq.reverse_complement() # 反向互补
                    n_seqid = seqid + "_" + str(tmp_l[1]) + ":" + str(tmp_l[2]) + "_" + str(tmp_l[3])
                    dict1[n_seqid] = seq

        records = []
        for seqid in dict1:
            seq = dict1[seqid]
            rec1 = SeqRecord(seq, id=seqid, description="")
            records.append(rec1)
        SeqIO.write(records, outfa, "fasta")


    @staticmethod
    def get_pos_list(infile):
        list_ = []
        with open(infile, 'r') as ff:
            for line in ff:
                line = line.strip()
                tag = line.split("\t") # chrom start end strand
                list_.append(tag)
        return list_


if __name__ == "__main__":
    positionFile, genomeFa, outfa = sys.argv[1], sys.argv[2], sys.argv[3]
    Promoter.get_promoter_by_genome(positionFile, genomeFa, outfa)